

How To Repair Vw Passat 1999 Cup Holder
Every bit a car possessor who takes pride in doing his own repairs, my articles focus on helping other vehicle owners handle DIY projects.
Broken Wire Harness Connectors
In all my DIYs, I always stress the need to be gentle when removing these clips. And sure enough, when I went to take pictures for my temp sensor article, I got a little also eager and broke the clip right off.
I had too broken one of the gyre clips many years agone, only the wire harness stayed on just fine and then I never worried almost it. This time I was not so lucky. (If you lot do have a cleaved prune on the whorl connection. and exercise not feel similar spending $30 and doing this repair, you lot can e'er use a zip necktie to proceed it in place).
This DIY covers how to replace the connection housings from the wires to the sensor, or whorl, or any part you happened to intermission off the connectedness to. The role number should be the same for MKIV and the newer MKV Jetta and GTI models too equally Audis and Passats. Just, as always, make sure you verify the part number with your local dealership earlier you buy the role.
I will exist doing the repair here on a temperature sensor plug, only it volition be the aforementioned operation for the other connections besides. If I ever break down and purchase a new scroll connection, I will upload pictures for that connector too.

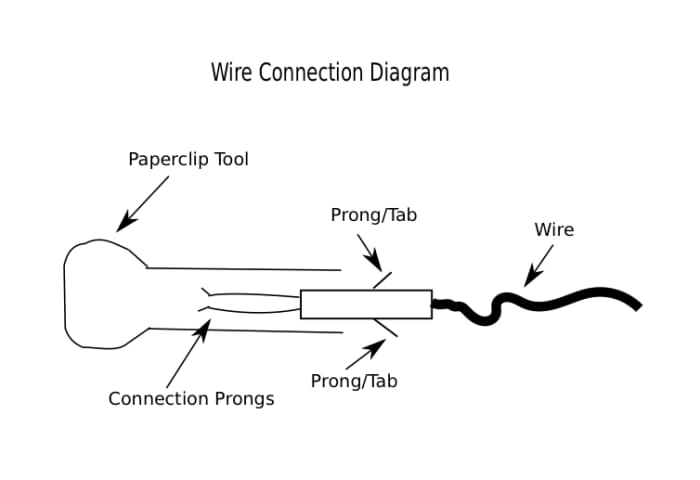
Needlenose pliers, replacement part, and paperclip for replacing cleaved wire-harness clips and connectors.
This DIY can exist done with household items. If you plan on going all out, you can purchase a specialty tool chosen a "Terminal Release Tool" for $70 to $110 that has the aforementioned effect as using a standard newspaper clip.
- A paper clip
- Hammer or vise grips
- Needle-nose pliers (optional)
- Small flathead screwdriver
- Replacement part
Depending on which clip yous broke, the most common housings are part numbers 4B0-973-724 and 4B0-973-712.
- 4B0-973-724 is the connectedness for the Mass Air Menses Sensor, coils, and the like, and runs effectually $30 each from the local dealership.
- 4B0-973-712 is the smaller plug used for the Temperature sensor, AIT sensor, Throttle Body and similar connections. That office volition run about $12 at the dealership.
These plugs can also exist ordered online from ECS Tuning for about $xviii and $nine.
Allow'southward MacGyver This B!!
Yeah, welcome dorsum to the '80s. If you decided confronting the hundred-dollar tool, then it's time to make your ain out of a paper clip.
For the larger connections (MAF or ringlet), use a large paper clip; for the smaller connections (temp sensor), use a small paper prune. Start by flattening the ends with a hammer or vise grips. Then curve the prune around till the 2 ends are a few mm apart. Wait at the "tools" motion-picture show above for reference. Yeah, that'due south it. So save your pen and rubber band for another twenty-four hours, my fellow MacGyver fans.
How to Replace Broken Wire Harness Connectors
To be honest, this is a quick and simple DIY, but it is a pain in the butt the first fourth dimension y'all do it. If you are changing the larger (MAF or scroll) connectedness, information technology should be a little easier.
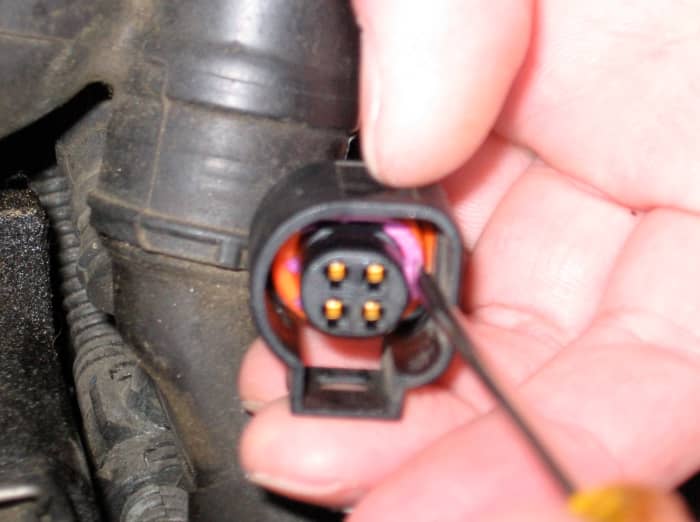
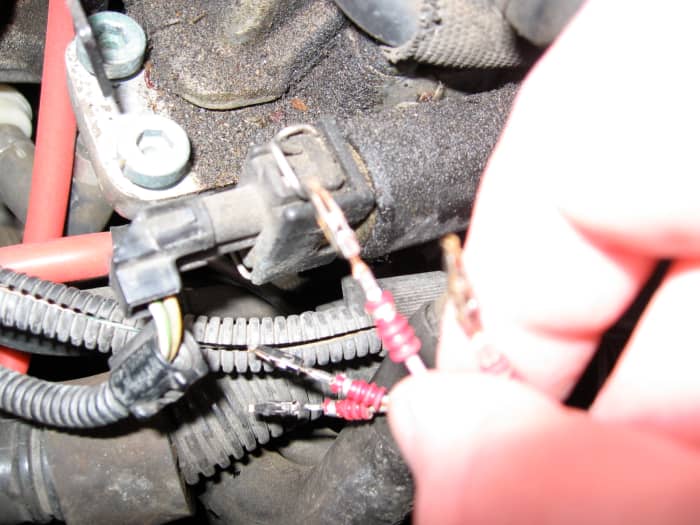
Step 1. The start thing you want to do is remove the pink/majestic clip inside of the harness. It slides out very easily, so utilise very piddling pressure. It also helps to place some paper nether whatever connector you're working on, so you don't drop these little pieces into the engine bay.
Gyre to Continue
Read More from AxleAddict
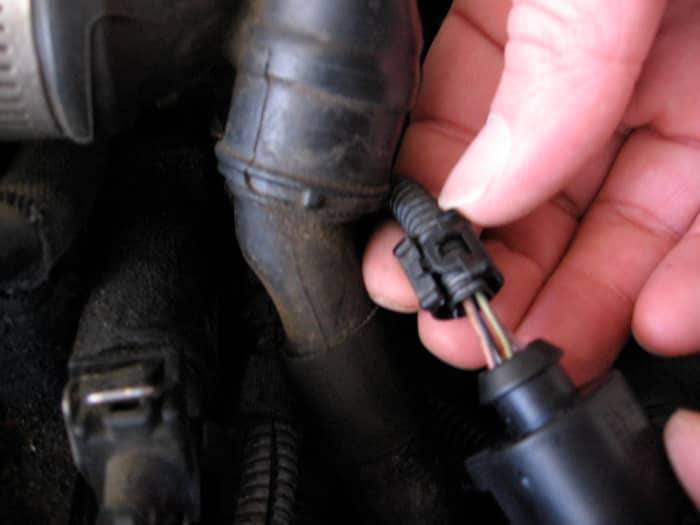
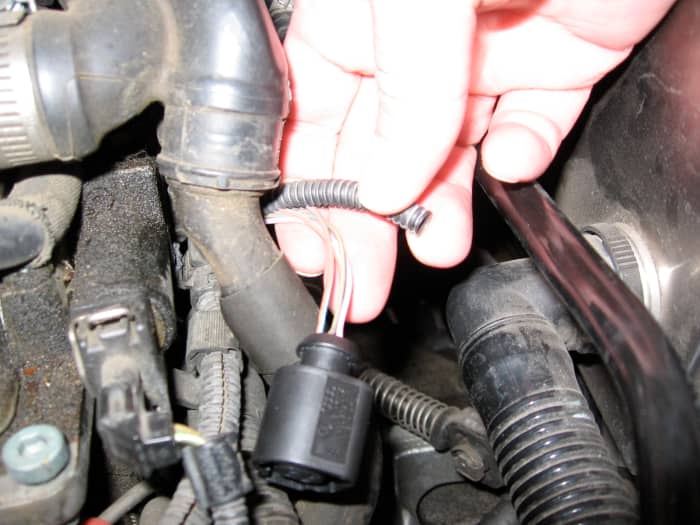
Pace 2. The black hose that covers all the wires has a little clench on it to keep it tight. It actually helps afterward on to take this off and pull out the wires. You tin remove it easily with your fingernail or a small screwdriver. Run into beneath.
Footstep 3. Take your homemade tool and wedge it in on both sides of the connexion pin (see below). The play tricks is to get it in deep enough to bend down the little tabs that are holding it in identify. I'd guess about a half centimeter in.
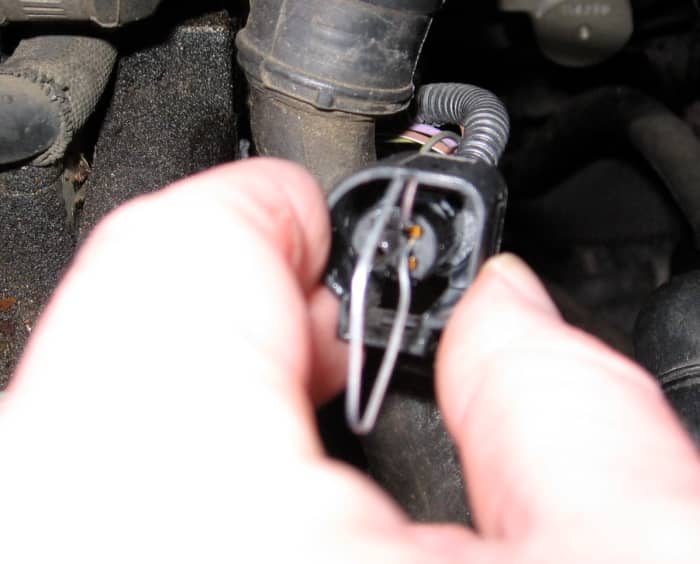
Step four. With your tool in identify, pull on the wire from the back side till it releases. It will take a footling persuasion, but don't rip it out with all your forcefulness (see diagram below for a meliorate instance of how the wire connections wait). Y'all're trying to release information technology without breaking off the tabs. You can also use your needle-nose pliers to become a good elongated grip on the wire.
The tabs or prongs are in in that location to concord the wire in identify. To release the wire from the harness, you push or bend these tabs downwardly slightly. These little tabs can be carefully opened back up with a penknife or small Swiss army knife before they are re-inserted into the new harness. Don't bend them besides much, as they are thin metallic, and suspension easily like everything else VW/Audi makes. If y'all do break the tab off of one side, don't be overly concerned; it volition yet stay in place in one case inserted into the harness.
Step v. Once all the wires have been released (two or iv, depending on the plug) you can bend back the tabs slightly, then the wire will hold firm in your new connector. Yous can utilise a penknife to slightly bend them out. The last photo shows the tabs, although the resolution is not that smashing.
Step six. Push the pins back into your new plug with your fingers, or with pliers if that helps. Make sure you write down which color wires come out of each pigsty. The plug harness volition be labeled with 1, 2, 3, and 4.
Wire Harness Diagrams
These are some drawings that should help with understanding the pin connector and keeping the wires in proper order.
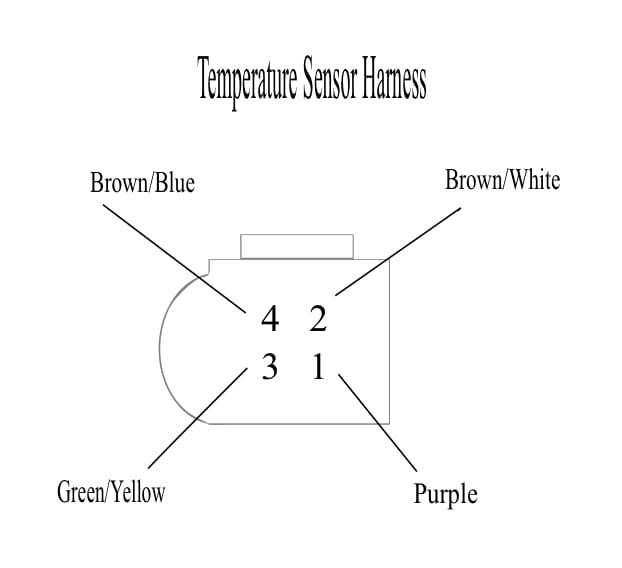
For the temperature sensor, the colors are:
- Royal
- Brown with white stripe
- Green with yellow stripe
- Chocolate-brown with blueish stripe
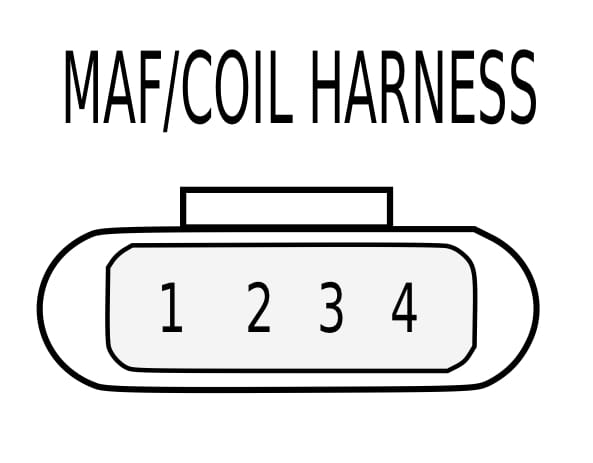
Maf/scroll diagram
Even on my own car, I accept different colors going to the 1, 2, 3, 4 on the coil, and then brand sure y'all write downward what colour is going to what connection before you lot pull out the wires.
- Red, blue/white
- Brown/tan, black/red
- Blue, dark brown/yellow
- Tan/yellow
This article is authentic and truthful to the all-time of the author's knowledge. Content is for informational or amusement purposes only and does not substitute for personal counsel or professional communication in business concern, fiscal, legal, or technical matters.
© 2022 Writen4u

How To Repair Vw Passat 1999 Cup Holder,
Source: https://axleaddict.com/auto-repair/How-to-Replace-Broken-Wire-Harness-ClipsConnectors-AudiVW-DIY
Posted by: mendozaonfor1968.blogspot.com
0 Response to "How To Repair Vw Passat 1999 Cup Holder"
Post a Comment